Table of Contents


Implementing Microservices in NestJS using Kafka

Introduction

In the previous section, we implemented microservices in NestJS using TCP communication. While TCP is simple and suitable for learning and basic use cases, real-world microservices architectures require more robust and scalable communication mechanisms. This is where message brokers like Apache Kafka come into play.

Apache Kafka is a distributed event-streaming platform designed for high throughput, fault tolerance, and scalability, making it a popular choice for microservices communication. In this blog, we will upgrade our NestJS microservices to use Kafka, enabling reliable asynchronous communication and better performance for production-ready systems.

What is Kafka? (Very Simple Explanation)

Apache Kafka is a message broker used to send data between different services in a microservices architecture.

Instead of services communicating directly with each other:

One service publishes a message

Another service consumes the message

Kafka acts as the middle layer that handles message delivery

This approach makes communication more reliable and scalable.

Real-Life Example

Think of Kafka like a post office:

The sender drops a letter at the post office

The receiver collects the letter later

The sender and receiver do not need to know about each other

Kafka ensures that the message is delivered safely, even if the receiver is temporarily unavailable

Why Use Kafka in Microservices?

Using Kafka improves communication between microservices by making them loosely coupled and highly scalable.

TCP vs Kafka Comparison

TCP

  • Direct service-to-service communication
  • Services are tightly coupled
  • Less scalable
  • No message replay support
  • Not fault-tolerant

Kafka

  • Message-based communication
  • Services are loosely coupled
  • Highly scalable
  • Message replay supported
  • Fault-tolerant and reliable

Kafka is production-ready, industry-standard, and widely used for building scalable microservices systems.

What We Will Build

In this tutorial, we will build four NestJS microservices that communicate with each other using Apache Kafka.

Microservices Overview

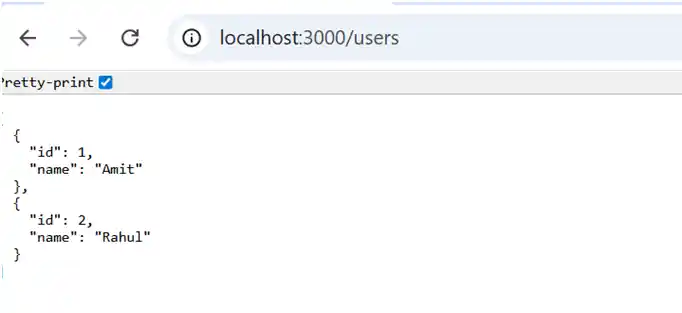
1.User Service – Manages user registration and user-related operations

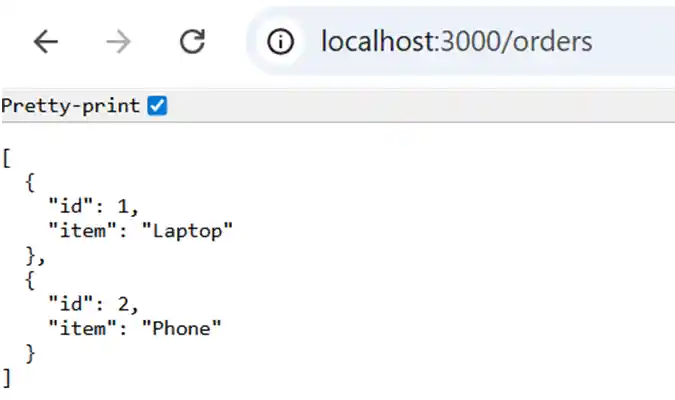
2.Order Service – Handles order creation and order management

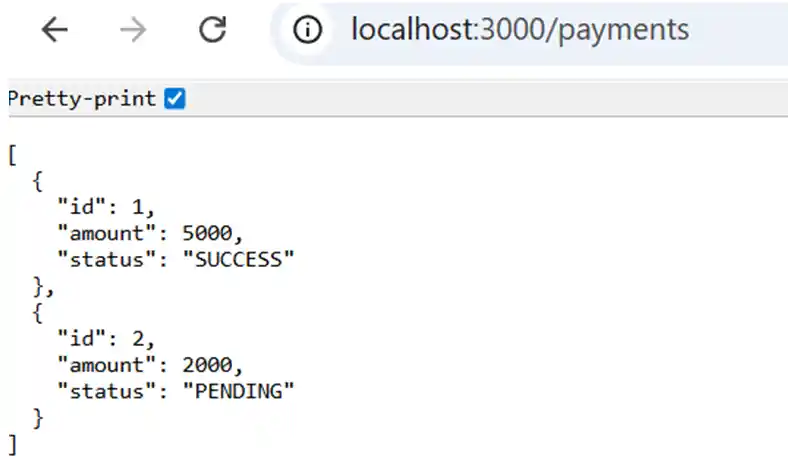
3.Payment Service – Processes payments and transactions

4.API Gateway – Acts as a single entry point for client requests and routes them to the appropriate services

Communication Layer

Apache Kafka will act as the message broker, enabling reliable, asynchronous communication between all microservices.

Architecture Overview

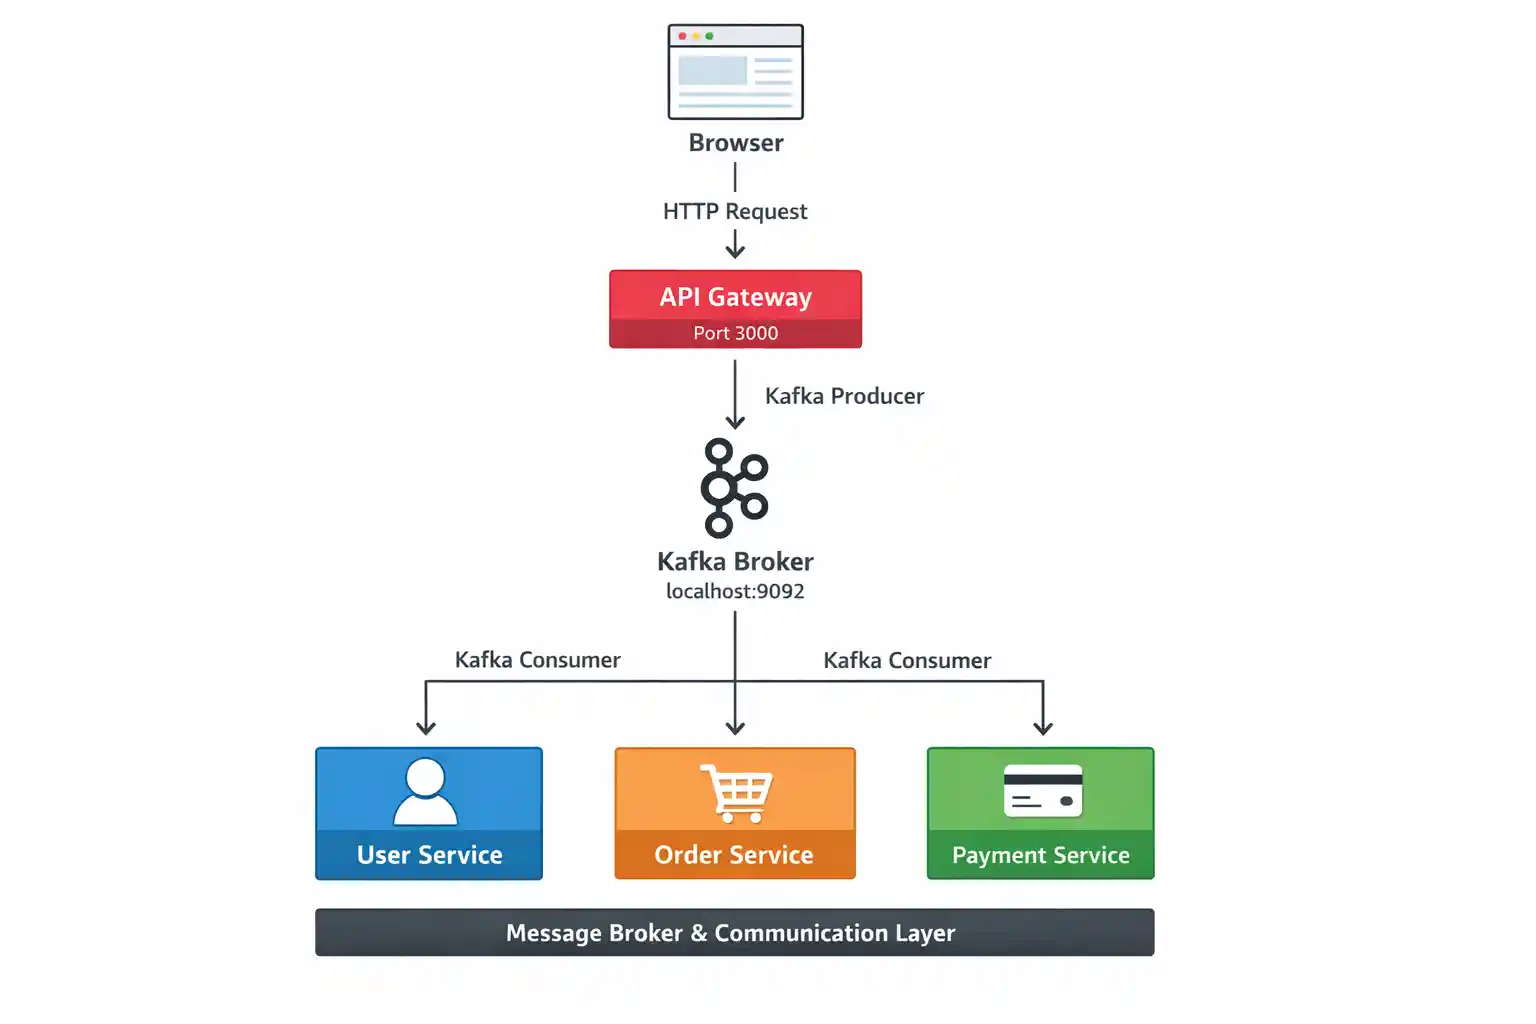
The following architecture illustrates how our NestJS microservices communicate using Apache Kafka.

High-Level Flow

1. The client (browser) sends an HTTP request to the API Gateway.

2. The API Gateway (running on port 3000) acts as the single entry point for all client requests.

3. Instead of calling services directly, the API Gateway produces Kafka messages and sends them to the Kafka Broker (running on localhost:9092).

4. User Service, Order Service, and Payment Service act as Kafka consumers, process the messages, and send responses back through Kafka.

Architecture Diagram

Prerequisites

Node.js (v18+ recommended)

NestJS CLI

Java JDK 8+

Apache Kafka (local install, no Docker, no Zookeeper)

Step 1: Install NestJS CLI


npm i -g @nestjs/cli		

Choose npm or yarn and enable TypeScript.

Step 2: Create NestJS Applications

3 Microservices

API Gateway – Client

Create four separate projects:

#1 nest new user-service

#2 nest new order-service

#3 nest new payment-service

#4 nest new api-gateway

Now we have four separate projects, which is the core idea of microservices and each project runs independently.

Step 3: Install Kafka Dependencies

Run this inside all four projects:


npm install @nestjs/microservices kafkajs		

Step 4: Install and Run Kafka

Kafka Requirements

Kafka requires

Java (JDK 8+)

Apache Kafka binaries

Download Kafka

Download from: https://kafka.apache.org/downloads

Extract the files, for example: C:\kafka\kafka_2.13-4.1.1

Generate Cluster ID

bin\windows\kafka-storage.bat random-uuid

Example output: 5Qs_AURGS_6pwjqwFqHPiQ

Format Storage (Standalone KRaft)


bin\windows\kafka-storage.bat format ^
  -t 5Qs_AURGS_6pwjqwFqHPiQ ^
  -c config\server.properties ^
  --standalone								

Start Kafka Broker


bin\windows\kafka-server-start.bat config\server.properties								

Kafka will run on:


localhost:9092								

Step 5: Configure User Service (Kafka Consumer)

Open user-service/src/main.ts


import { NestFactory } from '@nestjs/core';
import { AppModule } from './app.module';
import { MicroserviceOptions, Transport } from '@nestjs/microservices';

async function bootstrap() {
  const app = await NestFactory.createMicroservice(
    AppModule,
    {
      transport: Transport.KAFKA,
      options: {
        client: {
          brokers: ['localhost:9092'],
        },
        consumer: {
          groupId: 'user-consumer',
        },
      },
    },
  );
  await app.listen();
  console.log('User Service is running with Kafka');
}
bootstrap();							
							

Explanation

Transport.KAFKA → use Kafka instead of TCP

brokers → Kafka server address

groupId → identifies this service group

Step 6: Create User Message Handler

Open user-service/src/app.controller.ts


import { Controller } from '@nestjs/common';
import { MessagePattern } from '@nestjs/microservices';

@Controller()
export class AppController {

  @MessagePattern('get_users')
  handleGetUsers() {
    console.log('Kafka get_users event received');
    return [
      { id: 1, name: 'Amit' },
      { id: 2, name: 'Rahul' },
    ];
  }
}							

Kafka uses topics, not { cmd }.

Step 7: Configure Order Service

Open order-service/src/main.ts


import { NestFactory } from '@nestjs/core';
import { AppModule } from './app.module';
import { MicroserviceOptions, Transport } from '@nestjs/microservices';

async function bootstrap() {
  const app = await NestFactory.createMicroservice(
    AppModule,
    {
      transport: Transport.KAFKA,
      options: {
        client: { brokers: ['localhost:9092'] },
        consumer: { groupId: 'order-consumer' },
      },
    },
  );
  await app.listen();
  console.log('Order Service is running with Kafka');
}
bootstrap();							
							

Open order-service/src/app.controller.ts


import { Controller } from '@nestjs/common';
import { MessagePattern } from '@nestjs/microservices';

@Controller()
export class AppController {

  @MessagePattern('get_orders')
  handleGetOrders() {
    console.log('Kafka get_orders event received');
    return [
      { id: 1, item: 'Laptop' },
      { id: 2, item: 'Phone' },
    ];
  }
}							
							

Step 8: Configure Payment Service

Open payment-service/src/main.ts


import { NestFactory } from '@nestjs/core';
import { AppModule } from './app.module';
import { MicroserviceOptions, Transport } from '@nestjs/microservices';

async function bootstrap() {
  const app = await NestFactory.createMicroservice(
    AppModule,
    {
      transport: Transport.KAFKA,
      options: {
        client: { brokers: ['localhost:9092'] },
        consumer: { groupId: 'payment-consumer' },
      },
    },
  );
  await app.listen();
  console.log('Payment Service is running with Kafka');
}
bootstrap();
							

Open payment-service/src/app.controller.ts


import { Controller } from '@nestjs/common';
import { MessagePattern } from '@nestjs/microservices';

@Controller()
export class AppController {

  @MessagePattern('get_payments')
  handleGetPayments() {
    console.log('Kafka get_payments event received');
    return [
      { id: 1, amount: 5000, status: 'SUCCESS' },
      { id: 2, amount: 2000, status: 'PENDING' },
    ];
  }
}							
							

Step 9: Configure API Gateway (Kafka Producer)

Open api-gateway/src/app.module.ts


import { Module } from '@nestjs/common';
import { ClientsModule, Transport } from '@nestjs/microservices';
import { AppController } from './app.controller';

@Module({
  imports: [
    ClientsModule.register([
      {
        name: 'USER_SERVICE',
        transport: Transport.KAFKA,
        options: {
          client: {
            clientId: 'api-gateway-user',
            brokers: ['localhost:9092'],
          },
          consumer: {
            groupId: 'api-gateway-user-group',
          },
        },
      },
      {
        name: 'ORDER_SERVICE',
        transport: Transport.KAFKA,
        options: {
          client: {
            clientId: 'api-gateway-order',
            brokers: ['localhost:9092'],
          },
          consumer: {
            groupId: 'api-gateway-order-group',
          },
        },
      },
      {
        name: 'PAYMENT_SERVICE',
        transport: Transport.KAFKA,
        options: {
          client: {
            clientId: 'api-gateway-payment',
            brokers: ['localhost:9092'],
          },
          consumer: {
            groupId: 'api-gateway-payment-group',
          },
        },
      },
    ]),
  ],
  controllers: [AppController],
})
export class AppModule {}							
							

Step 10: API Gateway Controller (Request–Response)

Open api-gateway/src/app.controller.ts


import { Controller, Get, Inject, OnModuleInit } from '@nestjs/common';
import { ClientKafka } from '@nestjs/microservices';
import { firstValueFrom } from 'rxjs';

@Controller()
export class AppController implements OnModuleInit {
  constructor(
    @Inject('USER_SERVICE') private readonly userService: ClientKafka,
    @Inject('ORDER_SERVICE') private readonly orderService: ClientKafka,
    @Inject('PAYMENT_SERVICE') private readonly paymentService: ClientKafka,
  ) {}

  async onModuleInit() {
    this.userService.subscribeToResponseOf('get_users');
    this.orderService.subscribeToResponseOf('get_orders');
    this.paymentService.subscribeToResponseOf('get_payments');

    await Promise.all([
      this.userService.connect(),
      this.orderService.connect(),
      this.paymentService.connect(),
    ]);
  }

  @Get('users')
  getUsers() {
    return firstValueFrom(this.userService.send('get_users', {}));
  }

  @Get('orders')
  getOrders() {
    return firstValueFrom(this.orderService.send('get_orders', {}));
  }

  @Get('payments')
  getPayments() {
    return firstValueFrom(this.paymentService.send('get_payments', {}));
  }
}							
							

Step 11: Run the Applications

Start Kafka first.

Then in separate terminals:

1# cd user-service && npm run start

2# cd order-service && npm run start

3# cd payment-service && npm run start

4# cd api-gateway && npm run start

Step 12: Test in Browser


http://localhost:3000/users
http://localhost:3000/orders
http://localhost:3000/payments							

Now you will see user data coming from the microservice, like

#1 For User

#2 For Orders

#3 For Payments

What Happens if One Service Fails?

Stop Order Service

Users & Payments still work

Kafka keeps running

No system-wide crash

This proves microservice independence

Deployment Reality (Important)

❌ Netlify / Vercel

Serverless

No Kafka consumers

No background listeners

✅ Correct Deployment Options

AWS EC2

DigitalOcean

Railway

Render

Fly.io

Frontend (if any) can still go to Vercel / Netlify.

Conclusion

In this blog, we:

Upgraded NestJS microservices from TCP to Kafka

Implemented event-based communication

Built scalable and fault-tolerant services

Learned real-world deployment limitations

Kafka makes your NestJS microservices production-ready.

Ready to Build Something Amazing?

Get in touch with Prishusoft – your trusted partner for custom software development. Whether you need a powerful web application or a sleek mobile app, our expert team is here to turn your ideas into reality.

image